
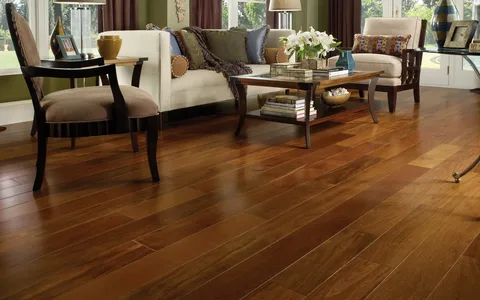
Installing laminate flooring over an existing wood floor is a popular and practical solution for homeowners looking to refresh the look of their interiors without undergoing a full renovation. This method offers the advantage of saving time and reducing labor costs, as it eliminates the need to remove the original wood surface. Laminate flooring provides a wide range of styles and finishes that mimic the appearance of real wood, stone, or tile, making it a versatile choice for any room. However, to ensure a smooth and long-lasting result, it’s important to assess the condition of the wood subfloor and follow proper installation techniques. In this article, we explore the key considerations, benefits, and step-by-step process of laying laminate flooring over wood.
wooden flooring – terrazzo tiles – vinyl carpet flooring
Benefits of Installing Laminate Over Wood Flooring
- Cost-Effective Upgrade: No need to remove the existing wood floor, which saves money on labor and disposal.
- Time-Saving Installation: Laying laminate over wood is quicker than a full floor replacement.
- Enhanced Aesthetic Appeal: Laminate comes in various styles and colors to match any decor.
- Durability and Resistance: Laminate is scratch-resistant and more durable than many wood floors.
- Improved Insulation: The combination of wood and laminate may enhance thermal and sound insulation.
- Easy Maintenance: Laminate surfaces are simple to clean and require minimal upkeep.
- Eco-Friendly Option: Reusing the existing floor reduces waste and environmental impact.
Your Wood Floor Suitable for Laminate Installation?
Determining whether your wood floor is suitable for laminate installation is a critical first step in ensuring a long-lasting and stable flooring upgrade. Not all wood floors offer the right foundation for laminate, so it’s important to assess the existing surface carefully. The first consideration is flatness. The wood floor must be level, with no major dips, humps, or warping. Even slight irregularities can cause laminate planks to shift, creak, or become damaged over time. Additionally, the floor must be dry and structurally sound. Moisture trapped in the wood can lead to mold or swelling, so make sure there are no leaks or damp areas before beginning installation.
Another important factor is stability. The existing wood floor should not move or flex when walked on. If the floorboards are loose or squeaky, they need to be secured or repaired before laying laminate on top. It’s also essential to check for pest damage or rot, especially in older homes, as these issues compromise the subfloor’s strength. Lastly, cleanliness matters: dirt, wax, or debris can interfere with the laminate underlayment or adhesive if used.
By evaluating these aspects and making necessary repairs or adjustments, homeowners can create a reliable base for laminate flooring, ensuring both durability and a professional-looking result.
Preparing the Wood Floor Surface
- Clean the Floor Thoroughly: Remove all dust, dirt, wax, and debris to ensure a smooth bonding surface.
- Repair Loose Boards: Secure any squeaky or loose wooden planks with nails or screws.
- Check for Moisture: Test for dampness or water damage and resolve any moisture issues.
- Ensure Levelness: Use a straight edge to check for dips or high spots; sand down or fill as needed.
- Remove Baseboards if Necessary: Detach baseboards or molding for a cleaner laminate fit against the wall.
- Fill Gaps and Holes: Use wood filler for cracks or gaps to avoid uneven laminate placement.
- Install an Underlayment: Lay down a moisture barrier or foam underlayment to improve insulation and stability.
- Allow Wood Floor to Acclimate: Let the existing wood adjust to room temperature and humidity if recently exposed to new conditions.
Tools and Materials You Will Need
- Laminate Flooring Planks: Choose high-quality planks with the desired design and thickness.
- Underlayment: A foam or moisture barrier underlayment for cushioning and protection.
- Measuring Tape: To measure room dimensions and plan accurate cuts.
- Utility Knife: Useful for trimming underlayment or cutting spacers.
- Spacers: To maintain expansion gaps between the laminate and walls.
- Chalk Line or Pencil: For marking straight layout lines.
- Tapping Block and Pull Bar: For fitting laminate planks tightly without damaging edges.
- Rubber Mallet: Gently taps planks into place for a secure fit.
- Jigsaw or Circular Saw: For cutting laminate planks around corners or obstacles.
- Vacuum or Broom: To keep the wood surface clean before and during installation.
- Safety Gear: Gloves, safety glasses, and a dust mask for personal protection.
- Level Tool: To check if the subfloor is even and flat before starting.
Step-by-Step Installation Process
Installing laminate flooring over an existing wood floor can be done efficiently by following a clear step-by-step process. Begin by cleaning the wood surface thoroughly, removing all dust, dirt, and debris to ensure a smooth foundation. Next, inspect the floor for any loose boards or uneven sections. Secure any movement with nails or screws, and fill in gaps or cracks with wood filler. Once the surface is level and clean, roll out your chosen underlayment across the entire area, trimming as needed to fit the space. This layer adds cushioning and acts as a moisture barrier.
Now, plan your layout by measuring the room and using a chalk line to ensure straight rows. Start placing the laminate planks along the longest wall, inserting spacers to leave an expansion gap between the planks and the wall. Use a tapping block and rubber mallet to snap the planks together firmly, working row by row. Stagger the joints between rows for a natural appearance and better stability. When you reach the final rows or edges, use a jigsaw to make precise cuts around corners and obstacles. Once all planks are in place, remove the spacers and reinstall baseboards or moldings to cover the expansion gaps. The result is a professional-looking laminate floor installed directly over your existing wood.
Maintenance Tips for Laminate Over Wood
- Sweep or Vacuum Regularly: Remove dust and dirt to prevent surface scratches.
- Use a Damp Mop, Not Wet: Clean with a slightly damp microfiber mop to avoid water damage.
- Avoid Harsh Chemicals: Use laminate-specific cleaners to preserve the finish.
- Place Rugs in High-Traffic Areas: Prevent wear and tear in busy zones like entryways.
- Use Furniture Pads: Attach pads under chairs and tables to avoid scratching the laminate
- Clean Spills Immediately: Wipe up liquids right away to prevent seepage into the seams.
- Trim Pet Nails: Prevent accidental gouging or scratching from pets.
- Maintain Proper Humidity: Use a humidifier or dehumidifier to avoid expansion or contraction.
- Don’t Drag Heavy Items: Lift furniture instead of dragging it across the floor.
- Inspect Regularly: Check for loose planks or edges and fix them before they worsen.
When to Consider Professional Help
While installing laminate flooring over a wood floor can often be a manageable DIY project, there are certain situations where seeking professional help is strongly recommended. One of the most important indicators is the condition of the existing wood floor. If the subfloor is uneven, severely damaged, or showing signs of moisture or mold, a professional can properly assess and repair it before installation. Attempting to lay laminate over an unstable surface can lead to long-term problems like buckling, gaps, or premature wear.
Another reason to hire a professional is if the layout of the space is complex or irregular. Rooms with multiple corners, curves, or obstacles such as stairs or built-in furniture may require advanced measuring and custom cuts that can be difficult without experience. Additionally, professionals have access to specialized tools and knowledge that help ensure a clean, level, and lasting installation.
Time constraints are also a factor. If you need the project completed quickly or with minimal disruption, a trained installer can finish the job more efficiently. Finally, professional installation often comes with warranties or guarantees, offering peace of mind that any issues will be handled correctly. For homeowners who want flawless results or are unsure of their DIY skills, turning to a qualified expert is a smart investment.
conclusion
In conclusion, installing laminate flooring over an existing wood floor is a practical and efficient way to upgrade the look of your space without the hassle of full floor removal. With proper preparation, the right tools, and careful attention to surface condition, this method can provide a durable and visually appealing result. Homeowners benefit from cost savings, quicker installation, and a wide variety of design options that laminate offers. However, ensuring the wood subfloor is clean, level, and dry is essential to avoid long-term issues. While many people can handle the process themselves, professional help is advisable in cases of complex layouts or damaged wood surfaces. Whether you choose to do it yourself or hire a pro, laying laminate over wood can be a smart, stylish, and long-lasting flooring solution for your home.